Tuesday, 26 November 2024

Florals in Fibre


                                                     Florals in Fibre


26 x 53 "


detail: 
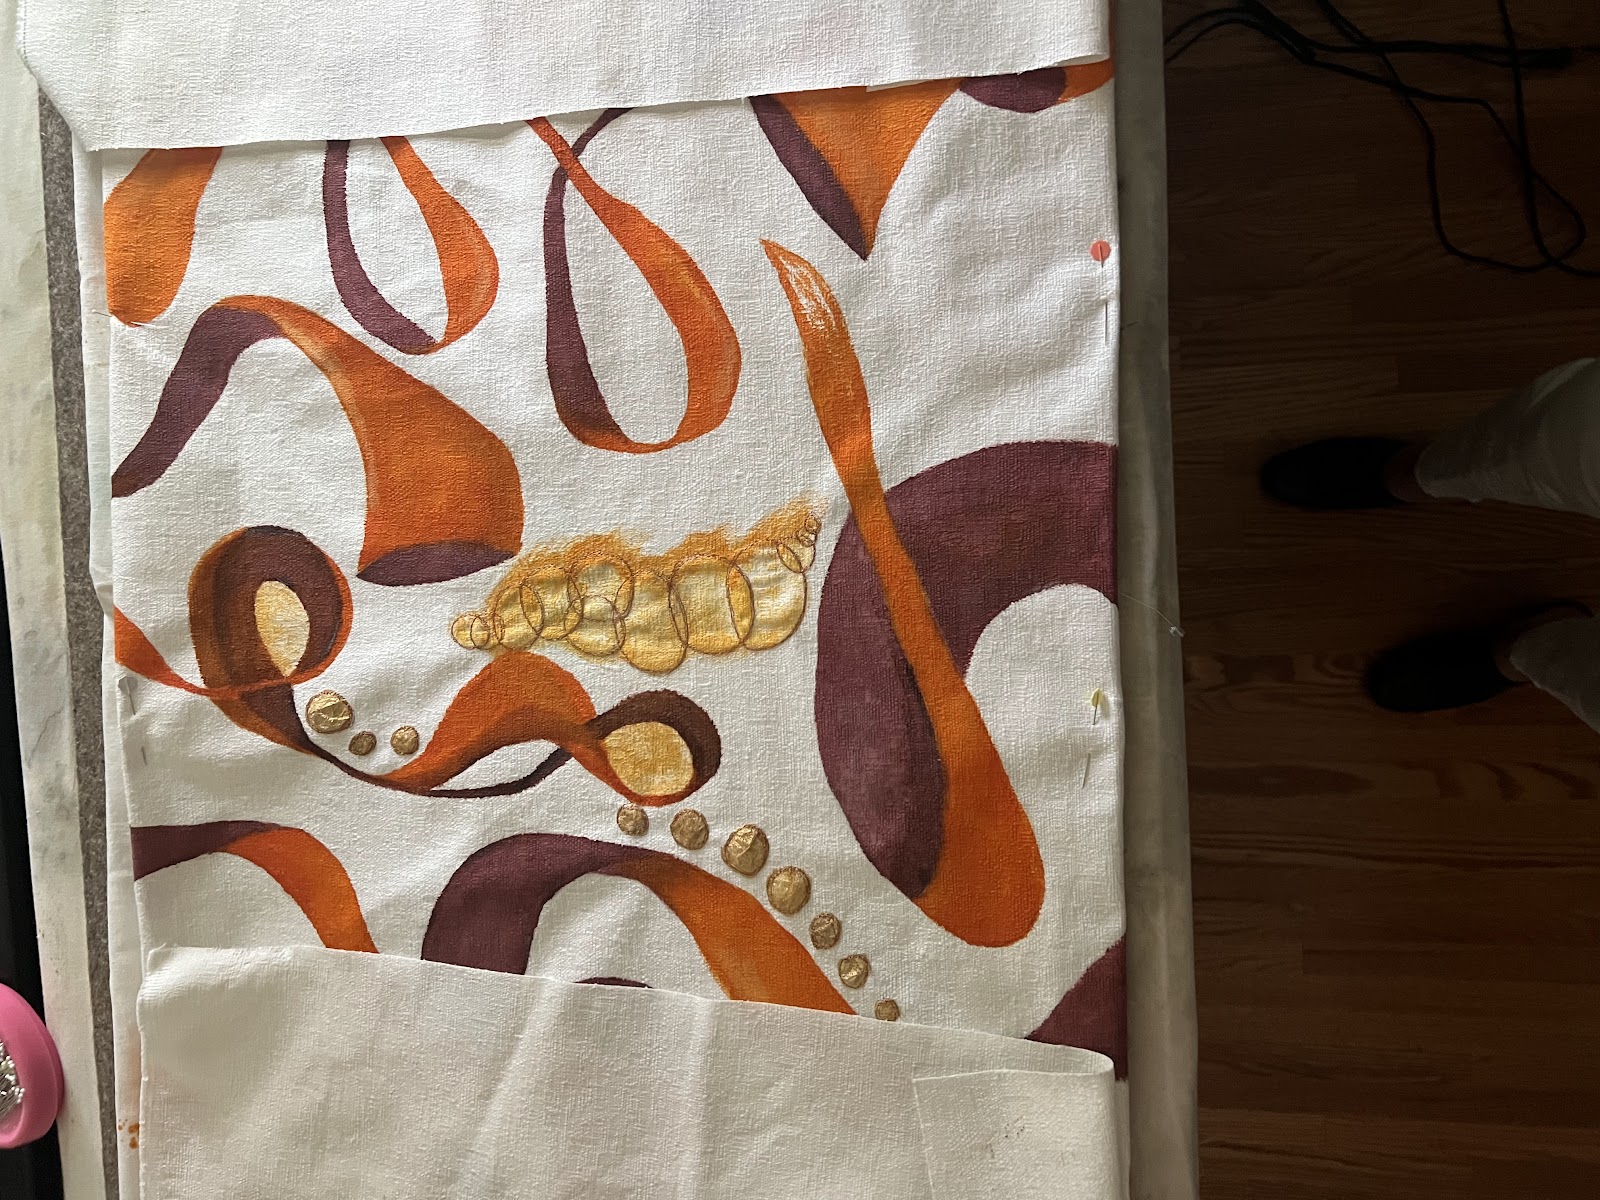
 This work began as a painting on white fabric.  A new idea.  I used 'Setacolor' Fabric paints that were Pearlescent.  I had ordered them from Dharma Trading, a small sampler pack to try out, but I have since found out that they are available in Toronto.


detail:
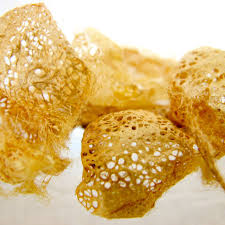
I began by drawing the design on the fabric and then painted. I enjoyed the painting process a lot, and will try this idea again.  For my first try I chose a simple floral design with the inspiration of the bugs and flora that I could spy from my window in the woods in the Laurentian mountains of Quebec, my happy place.


details:
The painting process took some time.  There was a bit of a learning curve to understand how these paints behave, whether they are blendable, how they 'lay on the fabric'.  In fact they are quite easy to use, and I would highly recommend this product if the idea of painting on cotton interests you.  I was able to achieve the details I sought and found as a first layer, it was quite successful.


details:
After the painting was done, I covered the motif with embroidery stitches, using a 6 ply, divided in half.  It is a bit more difficult to sew through the paint, it makes the fabric less porous.  It changes the hand of the cloth.  Not an insurmountable issue (obviously😏) but you do need a thimble.  My embroidery stitches are pretty simple.


Details:
After I was satisfied that there was enough embroidery floss on the canvas, I layered it up and covered it in free motion quilting echo'ing the motif.  I learnt some time ago, that quilting on top of the motif created the inverse of what I expected.  It pushes the motif to the back in effect.  I had hoped that not quilting on the flowers, but around them would bring them forward.  I do believe this is what happened.


Detail:
The echo quilting had another unanticipated result:  It gives a bit of a vibrational effect, as if the flowers are moving.  I went around each element until it 'bumped up' against the next element which creates a sense of movement that I am quite happy with and will try again.


Detail:
I left a few negative shapes at the top unquilted.  This too created an effect that I wasn't sure would work, but I like it.  It looks like little white clouds floating.

Of course, never one to leave well enough alone, after the quilting and finishing was done, I added  some beads to some of the flowers.


This took me about 4 months to complete, working on it pretty steadily.


Wednesday, 16 October 2024

Home


Home

                                                                            22" x 44"


This project has been a very personal exploration which I picked up and put down over several years.  It began with Adobe Illustrator wherein I gathered together all the places in the world where I have lived.  This compilation of many different maps became my own map, my life journey.


Detail: After the map was printed onto cotton, I layed a layer of batting  behind the surface and began stitching.  Many of the threads I used are irridescent and so 'in person' this piece glimmers while reflecting light.  The stitching became a fairly obsessive meditation on where I have been and what has landed me to where I am now.  I like to think of each stitch as a step on my path.


Detail:  At some point in the making process, a poem, my version of a Haiku, came to me.  Trying to respect the idea of adding words, out came the fabric paint  and on went the Haiku:
Placed
re-placed,
grounded.
Search for Connection,
Exploration is the Home.


Detail:  Where the stitches created circles was where I have spent larger parts or more significant parts of my life.  In this image one can see Toronto.  I added extra batting before I added the backing fabric behind these places and so they come forward towards the viewer.


detail:  Some of my steps led me in circles and some were linear.


Detail:  shot from the side, this image is an effort to illustrate the extra dimension of the places of significance.


Detail:  The map of Lac Notre Dame is of great significance,  This place has been my home away from home since my parents purchased a piece of land there in the 60's.  I covered the lake in white embroidery stitches to indicate its significance.


Detail: view of Lac Notre Dame


I have been working on this piece on and off for many years.  I gave myself time to think about what I wanted to do with it and how I thought these thoughts might be best expressed visually.  It has been a personal journey, but then, aren't all life journeys ultimately very personal?
 We try to grow in a positive way, create a meaningful impact, and leave a helpful trail for those who follow.


Tuesday, 24 September 2024

High Holidays Torah Mantle


Torah Mantle for the High Holidays


 Rabbi Elkin, of the Narayever Synagogue, was very pleased with the Torah Mantle I had created for their new smaller Torah.  So pleased in fact, that he asked me to create another one that would be used exclusively during the sacred High Holy Days.    This would mean that it would need to have a background of pure white as all the Torah Mantles used for these holidays are white, but beyond that I had artistic license to create.


Doodling on fabric with thickened Procion dyes


I knew that I wanted to create something completely different, and decided on an abstracted, rather than literal design, and my sketches led me to the notion of a twist,  or a spiral type of shape.


It occurred to me that this shape connects everything.  We can see it in the twisted vine, the trunk of a tree, the shape of a ram's horn, and even as it turns out (pun intended) in the shape of our DNA.


I found a beautiful bright white cloth with heavy weight, intended for outdoor furniture with a coarse weave.  It felt right. It absorbed the thickened dye well after I found the right consistency.  My first efforts to create a three dimensional image of a twist were woefully sad--see above--- but after some practice, a few tutorials, and some input from other creative spirits, I began to like what was happening.


I worked with the composition, as it needed to be effective even when only viewed in part, but especially when only the central part could be seen.  I chose the colours to represent honey, an important element of the rituals of our new year celebration.


When the painting was done, I wanted to add some stitching and embellishment.  Something that would be a very special addition.  A secret element appliqued.  For those who have a deep desire to investigate and know all..... see answer at the end..... but at this point in the story, try to imagine what those round gold filigree shapes are made from.  They are found in nature, and are provided by very small animal after her work (which is highly valued) is done.


The completed composition on my work table

Just checking it out from a distance


Detail: focusing on the central element to make sure it still 'dances'.


Rabbi Ed Elkin, receiving the new Torah Mantle.


Artist Statement

Preoccupied with the shapes that we share I notice the twist in a rose covered vine, a ram's horn, or the mapping of our DNA strands. These shapes are found everywhere, one only needs to pause, look, and notice.  True too these steps are necessary for creating connection between us and others as well as between ourselves and mother nature.  In this work I chose to highlight these curved twists to allow the viewer to imagine what they may represent.  The colours were chosen to represent the honey that sweetens our new year celebrations: the gift of the honeybee who offers us her bounty.

-----------------------------------------------------------------------------

For those of you who have given up trying to guess what the gold round filigreed shapes appliqued onto the Torah mantle are:  they are gold Cricula Cocoons lovingly spun by the industrious Cricula silkworm.  They are the lacey caps the wild silkworm spins and attaches to a tree branches from India to the Philippines, Sulawesi, Java, and Sri Lanka.
The gold colour is completely natural, all I did was cut out the round shapes and flatten the forms.  when examining them closely one can see a very intricate lacy filigree design:


another wonder of Mother Nature!


Tuesday, 10 September 2024

aloft


Aloft

32 " wide x 43 " long


Detail

My son is a climber.  A climber of all things, since he was able to walk, he wanted to be 'aloft'.  This work is based on a self portrait he took, while he was up in the crown of a tree.  The photo was enlarged and then printed on cotton.  


Detail
I 'free-motion quilted' every branch of the tree which I found to be a very meditative pursuit of hours,  probably weeks, all told.


Back
In this full photo of the back one can clearly see the density of stitching. 


Back, detail


Back, detail
After I completed the stitch work, I added a few hits of a bright green dye.


Detail, back

Although this is an old photo, he is still climbing, if not trees, as an arborist, then boulders, as a rock climber in British Columbia.  This is a passion that has sustained him, kept him 'Aloft', throughout his life.  This work is a tribute to this impressive singularity of purpose and passion.


Monday, 24 June 2024

Now We are Three


Now We are Three

37" x 64"


Another Beautiful Mama- to-Be 

This lovely young woman was expecting her first child and had some reservations about colour when it came to decorating.  Her home is quite "Maria Kondo", which means there is a lot of white, no clutter, and is impeccably neat and clean.  This felt quite challenging to me when designing a quilt for her baby but I was up for it.  My first step was to go with her to a quilting store.  We went to "Sew Sisters" in Toronto and after much browsing and great deliberation, came up with a nice big stack of bolts with enough colour for me, but not too much for mama.


As we reviewed our choices, all together, the combination felt soothing.  We knew that the baby was a boy, and so leaning into blue felt right.


Deciding on the pattern was left up to me, and I chose this pattern by Kim Schaefer.  In her book, Cozy Modern Quilts.  She illustrates it in deep reds and yellows but I hoped that  it would work well in our muted tones.  What I loved best about the pattern were the three rectangles at the centre of every block.  This led me to name the quilt;  "Now We are Three".


As most quilters know, most every good quilt begins with a lot of cutting.


Once the blocks were created, it was time to lay them out.  This is always a great use of the dining room table.  I had decided to create the blocks  randomly but with as much contrast that I could generate, given our muted tones.  I was a bit worried that such a low contrast collection might not make for an interesting quilt.


Once arranged, it was time to quilt it.  I quilted it simply, with straight stitch.  
It seemed the best choice for the design.


The completed project.  
I was frankly quite pleasantly surprised.  
Despite the limited range of colour, the completed design does make a statement.  
I think it is  quiet but elegant.


I pieced the back as well.  If the parents feel that the front is too busy, they can just flip it over.


I had one completed block left over as well as scraps so I decided to create a pillow to match.


The making of the pillow


I had made the binding of the quilt out of left over scraps, and I had left over scrappy binding so I decided to make a flange.  I had never done that before and wasn't exactly sure how to deal with the corners but after a couple of trials and errors, I managed.


The corners seem to be a bit gathered and I am not sure what I did to create that effect, but I did turn the corners as I would have were it binding.


I was pleased with the end result


The front of the pillow is actually a 3 layered quilt, and I quilted it with free motion quilting of hearts.


The backside of the pillow is two overlapping pieces of plain cotton so this will be easy to remove for cleaning.


this is the pillow in its new home.


and here are the pillow and quilt being road tested on the parents' bed.


A beautiful baby boy enjoying it for the first time at 3 weeks old!  
He seems very comfortable with it.